Understanding GZIP Compression
GZIP compression, often referred to simply as GZIP, is a method of file compression and decompression. In the vast landscape of the internet, where web performance is paramount, GZIP stands out as a crucial tool to optimize website load times and enhance user experience. To understand its significance, let’s delve into what GZIP compression is and how it functions.
Origin and Application
GZIP’s origins trace back to the early 1990s, created as a replacement for the UNIX ‘compress’ program. It was designed by Jean-loup Gailly and Mark Adler. While its primary use was for file compression on UNIX systems, its efficiency quickly found application in web technologies.
Today, GZIP is predominantly used to reduce the size of web files — be it HTML, CSS, or JavaScript files. When a browser visits a website, these compressed files are transmitted to the browser, which then decompresses them, rendering the content to the end-user. This compressed transmission ensures that data uses less bandwidth and arrives more quickly, leading to faster web page load times.
The Basics of GZIP Compression
At its core, GZIP works by identifying repetitive strings or sequences within a file and replacing them with shorter representations. For instance, in an HTML file, tags like <div>, <header> , and others might appear frequently. GZIP identifies such patterns and creates a dictionary of sorts, assigning shorter codes to these repetitive sequences. This drastically reduces the overall size of the original file itself.
File Types and GZIP
While GZIP is fantastic for compressing text-based files such as HTML, CSS, and JavaScript, it’s not always the best choice for other file types. Images, videos, and some other media types often have their compression methods and don’t benefit significantly from GZIP. In fact, trying to GZIP already compressed files can sometimes even increase their size slightly.
The Decompression Process
When a browser receives a GZIP-compressed file, it recognizes the need for decompression. Modern browsers come equipped with the capability to decompress GZIP files seamlessly. They’ll use the dictionary created during the compression process to revert the uncompressed file to its original state, allowing the web page’s content to be rendered correctly. This entire process, from compression on the server to decompression in the browser, is often so fast that end-users remain oblivious to its occurrence.
GZIP compression is akin to packing a suitcase for a trip. It’s about efficiently arranging content to occupy the least amount of space, making the journey (or in this case, data transmission) smoother and faster. As the digital age continues to evolve, tools like GZIP remain indispensable in providing optimized web experiences.
HTTP Compression
HTTP Compression is a vital capability that allows web servers to compress the data they send to web browsers, which the browsers then decompress and render for users. This mechanism reduces the amount of data transmitted, leading to faster webpage loading times, reduced server load, and less bandwidth consumption. One of the common methods for HTTP compression is GZIP, which we discussed earlier. However, before diving deeper into the types of compression, it’s essential to understand the fundamental difference between lossy and lossless compression.
What’s the Difference Between Lossy and Lossless Compression
Compression algorithms can be broadly classified into two categories based on how they treat uncompressed data: lossy and lossless. The primary difference lies in the fidelity of the compressed data when decompressed:
- Lossy Compression: Data is compressed by removing some of its information. When decompressed, the data isn’t identical to the original, leading to a loss of quality. This is acceptable in scenarios where slight data loss doesn’t significantly impact the end result, like in images or audio files.
- Lossless Compression: Ensures that every bit of data remains intact during the compression. When a file compressed using lossless compression is decompressed, it returns to its original state without any loss of information. This type of compression is crucial for text-based files or any application where data integrity is paramount.
Lossy Compression
Lossy compression works by approximating data and eliminating what it considers “unnecessary” details. For instance:
- Images: Formats like JPEG use lossy compression. When you save an image in a high compression JPEG format, some of the finer details might be removed. For many applications, this is acceptable as the loss in quality is often imperceptible to the human eye.
- Audio: Formats like MP3 or AAC are examples of lossy audio compression. They remove sound frequencies that the human ear typically doesn’t pick up, resulting in smaller file sizes at the expense of some loss in audio quality.
Lossy compression’s primary advantage is the significant reduction in file size it can achieve. However, repeated compressions can degrade quality substantially, making it essential to find a balance.
Lossless Compression
Lossless compression ensures that every piece of information is retained. Common examples include:
- Text Files: Algorithms like GZIP or Brotli are used for compressing text-based files. As the integrity of every character in a text file is critical, lossless compression is necessary.
- Images: Formats like PNG or TIFF use lossless compression, ensuring that the image remains unchanged no matter how many times it’s compressed and decompressed.
- Audio: Formats like FLAC or ALAC offer lossless audio compression. They provide a faithful representation of the original audio source, making them preferred choices for audiophiles and professional applications.
While lossless compression doesn’t reduce file sizes as dramatically as lossy compression, it guarantees the integrity of the data, making it indispensable in many scenarios.
In essence, the choice between lossy and lossless compression hinges on the specific requirements of an application. Understanding their differences and applications ensures that data is stored and transmitted in the most efficient manner without compromising on quality.
How Does Gzip Work?
Gzip, short for GNU zip, has become a standard when it comes to compressing web content. Despite the complexity of its underlying algorithms, the essence of how Gzip operates can be understood with a closer look. So, how does Gzip compress data so effectively? Let’s break it down.
Fundamental Approach
At a high level, Gzip’s compression algorithm is built on two primary algorithms: LZ77 (Lempel-Ziv 1977) and Huffman coding. The process involves searching for duplicate strings or sequences within a data set and then replacing them with shorter references, ultimately reducing the overall size of the file.
1. LZ77 Compression
The first step of Gzip’s compression process involves the LZ77 algorithm, which is based on the principle of replacing duplicate strings with pointers to previous instances.
How it works:
- Gzip scans the data to find repetitive sequences or strings.
- When a repetition is found, instead of storing the entire string again, Gzip stores a reference to the previous instance. This reference contains the distance to the original string and the length of the string.
- This method is particularly efficient for text files where certain sequences of characters (like HTML tags or common English phrases) are repeated frequently.
For instance, in a sentence like “The quick brown fox jumped over the lazy dog, and the dog barked,” the word “the” and “dog” are repeated. LZ77 would replace the second occurrence of these words with pointers to the first occurrence, saving space.
2. Huffman Coding
While LZ77 reduces the file size by eliminating repetitive sequences, Huffman coding optimizes the process further by encoding frequently occurring sequences with shorter codes and less frequent sequences with longer codes.
How it works:
- Gzip first builds a frequency table, determining how often each sequence or character appears in the data.
- Using this frequency table, a Huffman tree is created. Sequences or characters that occur more frequently are placed closer to the root (and thus have shorter codes), while less frequent ones are placed further away.
- The data is then encoded using this tree, substituting the original sequences with their new Huffman codes.
For example, in a text or file format where the letter “e” appears most frequently, Huffman coding might represent “e” with a shorter code like “10”, while a less common letter like “z” might get a longer code like “110110”.
Combining LZ77 and Huffman Coding
Gzip first applies LZ77 to spot and replace repetitive sequences of bytes with pointers. The output from this step, which includes both the original sequences and the pointers, is then passed through Huffman coding. The combination of these two methods allows Gzip to compress data efficiently, often achieving significant reductions in file size.
Why Do We Use GZIP Compression?
GZIP compression has become an integral part of web optimization strategies, and its widespread adoption is not without reason. Here’s a closer look at why GZIP compression is so widely used in the digital realm:
1. Faster Page Load Times
Web performance directly influences user experience. Slow-loading websites can deter visitors, leading to increased bounce rates. By compressing web content, GZIP significantly reduces the amount of data transmitted from the server to the client. This results in quicker data transfer times, and consequently, faster page load times.
2. Reduced Bandwidth Consumption
Every byte of data transferred over the internet consumes bandwidth. With the exponential growth of digital content, bandwidth costs can add up quickly for website operators, especially those with high traffic. GZIP compression can reduce file sizes by up to 70%, leading to significant bandwidth savings and reduced costs.
3. Enhanced User Experience
In our fast-paced digital world, users expect websites to load quickly and smoothly. GZIP compression ensures that web pages are lightweight, leading to a smoother and more enjoyable browsing experience. A better user experience can improve visitor retention and increase engagement.
4. Improved Search Engine Ranking
Search engines, including Google, use page load times as a factor in their ranking algorithms. Faster-loading websites are more likely to rank higher in search results. By implementing GZIP compression, websites can potentially benefit from improved visibility in search results, driving more organic traffic.
5. Universality and Support
Modern browsers have built-in support for GZIP compression. When a browser that supports GZIP requests a webpage, it includes a header indicating its capability to handle compressed content. Web servers, recognizing this header, can then deliver the compressed version of the content. This widespread support ensures that a vast majority of users will benefit from compressed content without any additional configurations.
6. Seamless Operation
One of the notable advantages of GZIP compression is its transparency. The entire process of compressing on the server-side and decompressing on the client-side is seamless. Users are often unaware that they are accessing compressed content, as browsers handle decompression automatically.
7. Preservation of Data Integrity
GZIP is a lossless compression method, meaning that even though the data is compressed, no information is lost. When the browser decompresses the data, it’s identical to the uncompressed original. This ensures that the quality and integrity of content, especially text-based content, remain intact.
How to Enable GZIP Compression
Implementing GZIP compression can make a considerable difference in the performance of a website. Enabling it typically varies based on the platform or server you are using. Below are the steps to enable GZIP compression on Apache and NGINX web servers, as well as within a WordPress installation.
On an Apache Web Server
Apache, one of the most widely used web servers, supports GZIP compression through the `mod_deflate` module.
Steps:
- Ensure mod_deflate is Enabled: Before making any changes, ensure that the `mod_deflate` module is installed and activated. You can do this by running:
a2enmod deflateThen, restart Apache to apply the changes.
- Configure .htaccess: Navigate to the root directory of your website and locate the `.htaccess` file. Add the following code to enable GZIP compression:
<IfModule mod_deflate.c>

	AddOutputFilterByType DEFLATE text/plain

	AddOutputFilterByType DEFLATE text/html

	AddOutputFilterByType DEFLATE text/xml

	AddOutputFilterByType DEFLATE text/css

	AddOutputFilterByType DEFLATE application/xml

	AddOutputFilterByType DEFLATE application/xhtml+xml

	AddOutputFilterByType DEFLATE application/rss+xml

	AddOutputFilterByType DEFLATE application/javascript

	AddOutputFilterByType DEFLATE application/x-javascript

</IfModule>- Restart Apache: After adding the above code, save the `.htaccess` file and restart your Apache server for the changes to take effect.
On an NGINX Web Server
NGINX, another popular web server, supports GZIP compression natively.
Steps:
- Edit the Configuration: Open the NGINX configuration file, typically found at `/etc/nginx/nginx.conf`.
- Add GZIP Directives: Inside the `http` block, add or modify the following gz file directives:
gzip on;

	gzip_vary on;

	gzip_proxied any;

	gzip_comp_level 6;

gzip_types text/plain text/css text/xml application/json application/javascript application/xml+rss application/atom+xml image/svg+xml;- Reload NGINX: After making the changes, save the configuration file and then reload NGINX to apply them:
sudo systemctl reload nginxIn WordPress
For WordPress users who might not have direct access to server configuration or prefer an easier method, several plugins can help enable GZIP compression.
Steps:
- Install a Plugin: Navigate to your WordPress admin panel, go to ‘Plugins’, and click on ‘Add New’. Search for GZIP compression plugins. Some popular choices include “WP Super Cache”, “W3 Total Cache”, and “WP Fastest Cache”.
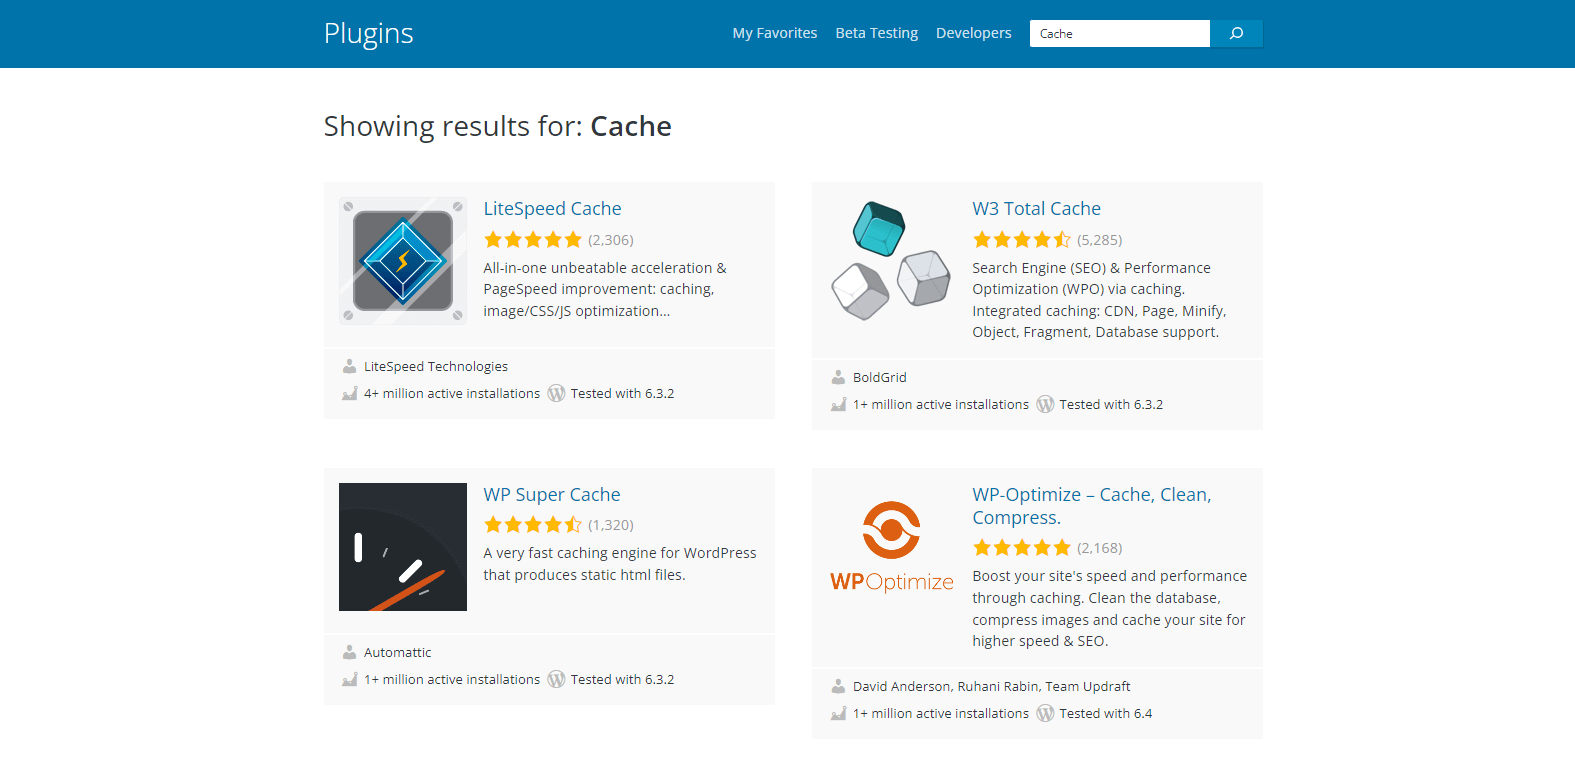
- Activate & Configure : Once you’ve chosen and installed a plugin, activate it. Follow the plugin’s documentation or on-screen prompts to configure GZIP compression.
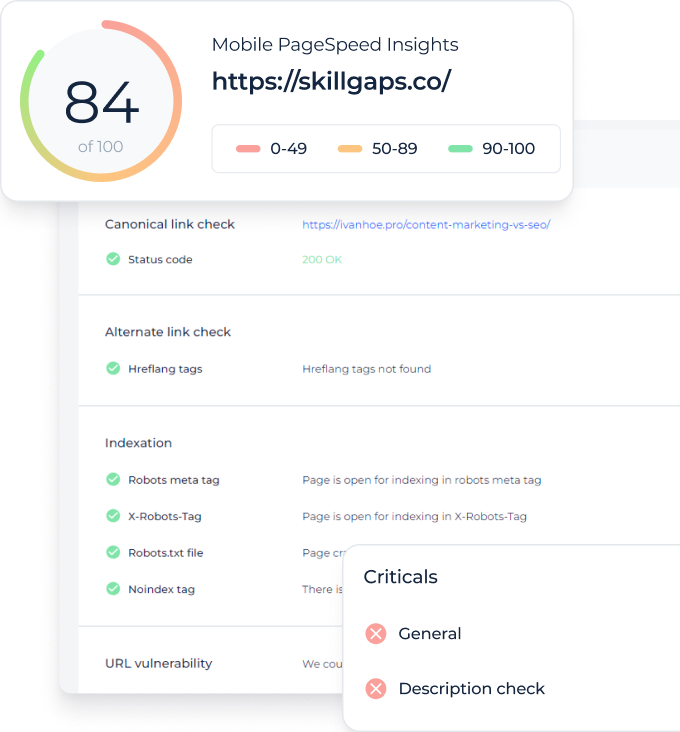
- Test : After enabling GZIP via a plugin, you can use online tools like GTmetrix or Google’s PageSpeed Insights to verify that GZIP compression is active.
Enabling GZIP compression is a straightforward process that can result in significant performance gains for your website. Whether you’re using a dedicated server setup or a content management system like WordPress, ensuring GZIP is active should be a priority in your web optimization checklist.
How To Check GZIP Compression
Once you’ve enabled GZIP compression on your website, it’s essential to confirm that it’s working correctly. There are several methods to verify GZIP compression – ranging from online tools to browser developer tools. Let’s delve into some of the most popular techniques.
Online GZIP Compression Test
Several online tools can check if your website has GZIP compression enabled:
Steps:
- Navigate to a GZIP compression test tool, such as GIDNetwork’s GZIP Test.
- Enter your website’s URL into the provided field.
- Run the test. The tool will then fetch your site and determine whether GZIP compression is active.
These tools are straightforward and provide a clear yes or no answer, making them ideal for those who prefer a quick and easy check.
Online Speed Test Sitechecker
Performance testing tools often include checks for GZIP compression as part of their suite of tests:
Steps:
- Visit a comprehensive speed test tool like GTmetrix.
- Input your website’s URL and start the analysis.
- Once the test is complete, check the report. GTmetrix, for example, provides details under “PageSpeed Score” or “YSlow Score” where you can see if GZIP compression is enabled for your site’s resources.
Such tools are advantageous as they not only verify GZIP compression but also provide insights into other performance metrics and optimization recommendations.
Check the HTTP Header in Developer Tools
Browser developer tools offer a more hands-on approach to verify GZIP compression by inspecting HTTP headers:
Steps:
- Open Developer Tools: In most browsers, right-click on your webpage and select “Inspect” or “Inspect Element”. Alternatively, you can use shortcuts like Ctrl+Shift+I (Windows/Linux) or Command+Option+I (Mac).
- Network Tab: Go to the “Network” tab in the developer tools pane.
- Reload the Page: Refresh your website. This step ensures that you capture all the network requests made by the site.
-
Inspect Headers: Click on the main document (usually the first entry in the list or the one matching your domain). In the right pane, look under the “Headers” section. Here, you’ll find all the HTTP headers related to that request.
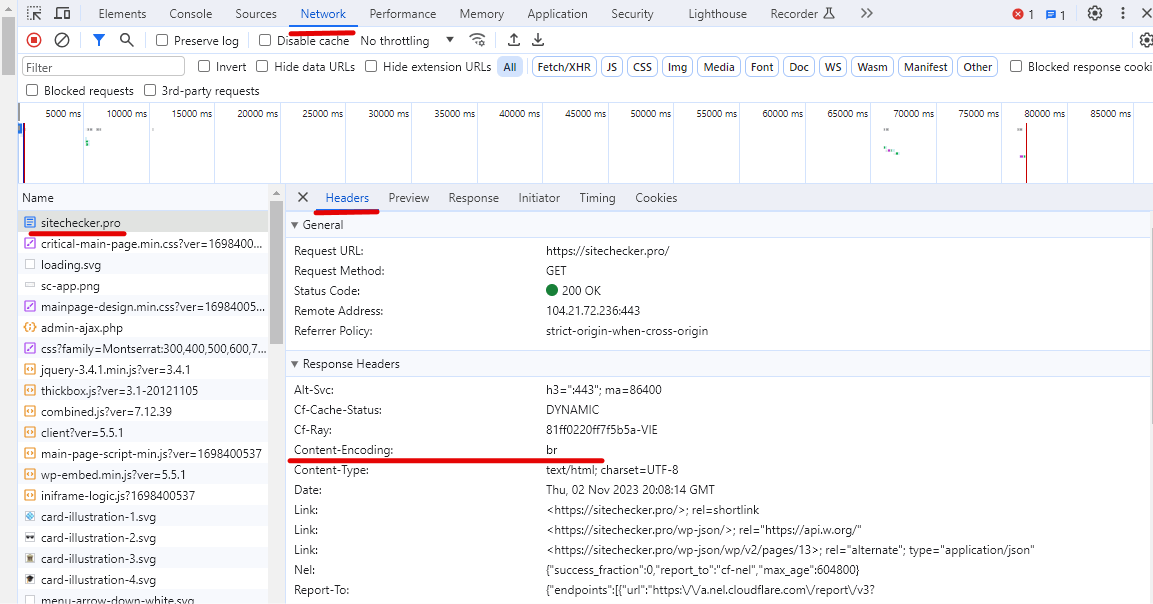
- Check for “content-encoding”: Under the “Response Headers” section, look for a header named “content-encoding”. If GZIP compression is enabled and working, this header’s value will be “gzip”.
Using browser developer tools provides a deeper insight into your website’s requests and responses. It’s an excellent method for those who want to understand the technical side of things better.
Verifying that GZIP compression is active ensures that you’re reaping the benefits of faster load times and reduced bandwidth consumption. With a mix of online tools and browser-based methods at your disposal, it’s easy to ensure that your website’s optimization efforts are on track.
Utilizing Gzip with a CDN to Enhance Content Delivery
The evolution of the web has led to an increased emphasis on performance optimization techniques, among which GZIP compression and Content Delivery Networks (CDNs) stand out. When used together, these two can significantly enhance the delivery of content to end-users. Let’s understand how GZIP and CDN can be synergized for optimized content delivery.
Understanding the Basics
Before diving deep, let’s quickly grasp the fundamentals:
- GZIP Compression: A method that reduces the size of your web files (like HTML, CSS, and JavaScript) so they can be delivered to users more quickly.
- Content Delivery Network (CDN): A system of distributed servers that deliver web content based on the geographic locations of the user, the origin of the web page, and the content delivery server. This ensures users get content from the nearest server, leading to faster load times.
Synergizing GZIP and CDN
- Faster Content Delivery: CDNs already reduce latency by serving content from the nearest edge server. With GZIP compression enabled, the size of the content gets reduced, making the transfer even faster.
- Bandwidth Savings for CDNs: GZIP compression can reduce the size of web files significantly. When these compressed files are stored and delivered by the CDN, it results in bandwidth savings. This not only benefits the website owner in terms of cost but also ensures CDNs can serve more content with the same resources.
- Global Reach with Consistency: CDNs have edge servers located worldwide. When GZIP compressed content is distributed across these servers, it ensures that users across the globe experience consistently fast load times.
- Automatic Compression: Many modern CDNs offer automatic GZIP compression. This means, once you upload your content to the CDN, it will automatically compress appropriate file types using GZIP before distributing them to edge servers.
Implementation Tips
- Ensure Compatibility: Before enabling GZIP on your CDN, make sure that your server content is GZIP-compatible. Most modern servers and CDNs support GZIP, but it’s always good to check.
- Selective Compression: Not all content benefits from GZIP compression. For example, binary files or already compressed files (like JPEGs) might not see significant size reductions. Use GZIP mainly for text-based content like HTML, CSS, and JavaScript.
- Cache Control: When using a CDN, set appropriate cache headers. This ensures that the CDN knows when to consider content as “stale” and fetch a fresh copy from the origin server. With GZIP and caching working hand in hand, users get the benefits of both compressed and fresh content.
- Monitor Performance: Regularly monitor the performance of your website using tools like GTmetrix or Google’s PageSpeed Insights. This will give insights into how well GZIP and CDN are working together and highlight areas of potential improvement.
Combining the power of GZIP compression with the distributed delivery mechanism of a CDN offers an effective solution for optimizing web performance. As web users become increasingly global and demand fast, seamless experiences, leveraging both these technologies will be vital for website owners aiming for excellence in user experience.
Check GZIP Compression to Test if GZIP is Enabled on a Specific Page
The Check GZIP Compression tool by SiteChecker is a pivotal resource for webmasters looking to optimize their website’s loading speed. In the age of instant gratification, ensuring your website’s data is efficiently compressed for rapid transmission is non-negotiable. This tool quickly assesses whether your web server is effectively using GZIP, a standard method for compressing web pages and stylesheets before sending them over to browsers, which in turn can significantly enhance user experience with faster page loading times.
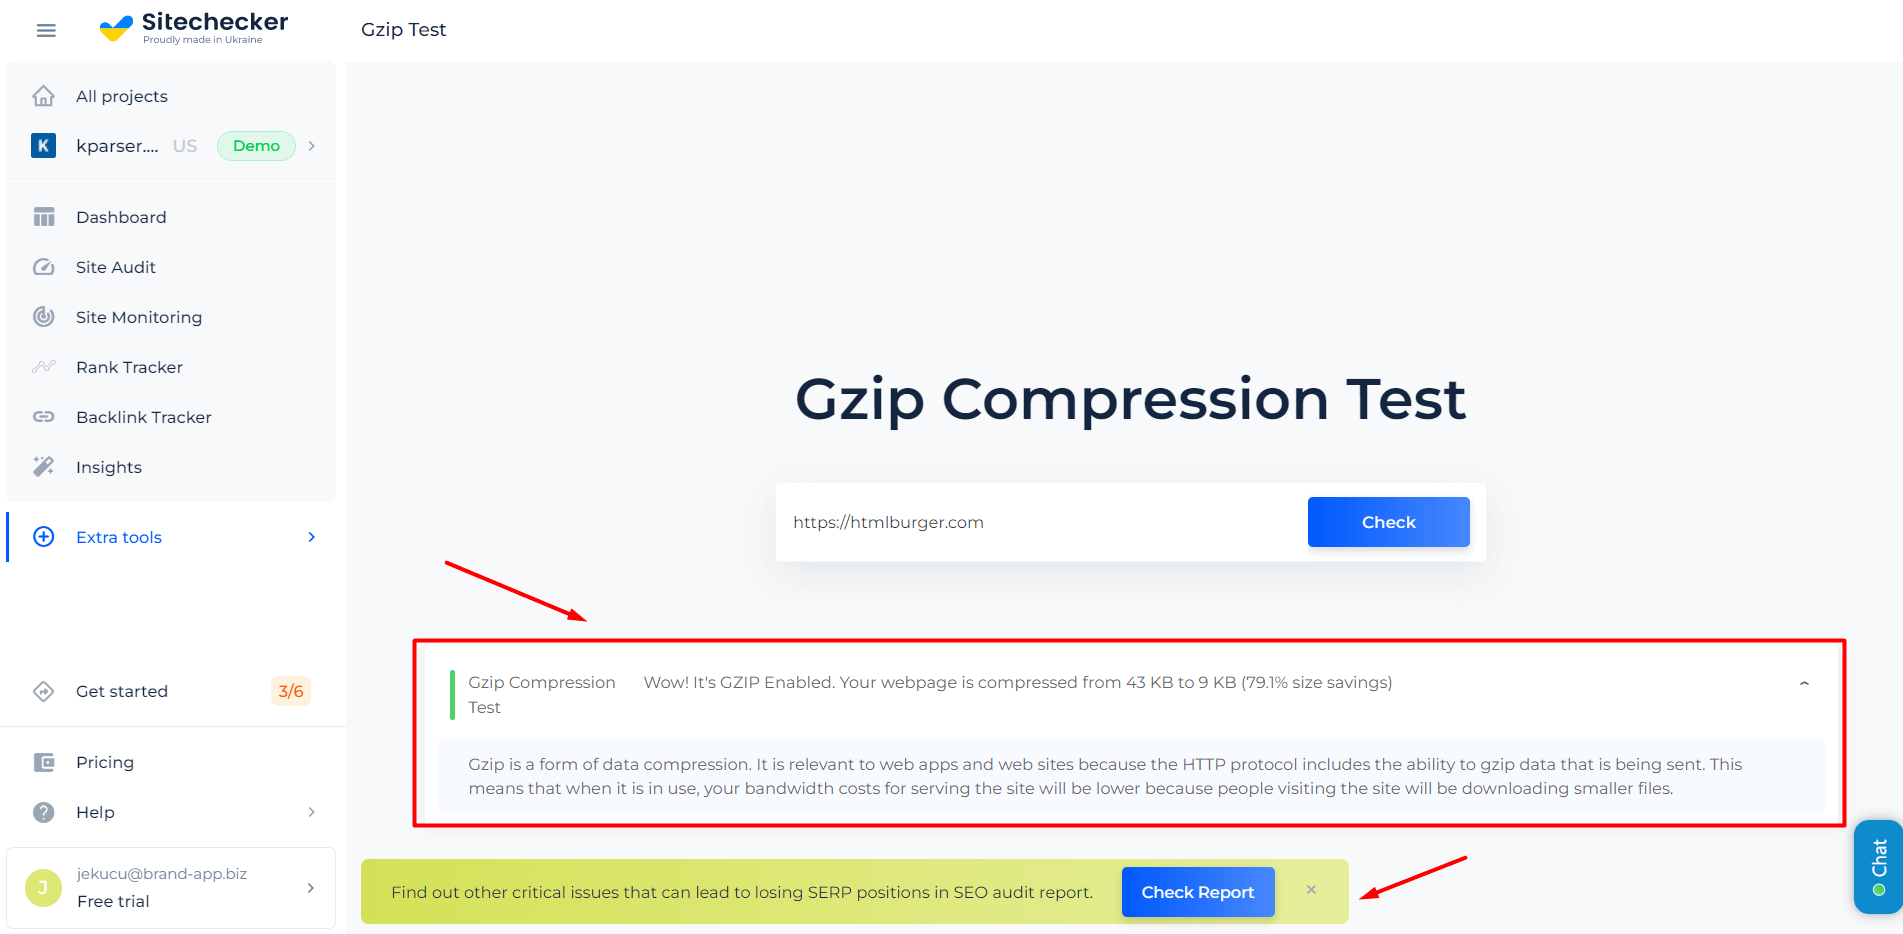
In addition to its primary compression verification feature, the tool offers insightful analytics on the level of compression achieved and the subsequent potential reduction in data transfer. This can be instrumental in not only improving website performance but also in reducing server load and bandwidth costs. The Check GZIP Compression tool also advises on how to implement or improve GZIP compression if it isn’t up to par, providing a full-circle solution to website performance tuning.
Confirm Your Site's GZIP Compression!
Use our Check GZIP Compression tool and keep your pages lightning-speed for users.
Conclusion
The digital landscape’s continual evolution emphasizes the necessity of efficient content delivery mechanisms. By understanding and integrating tools and techniques like GZIP compression and CDNs, web administrators and developers can significantly enhance user experiences. GZIP ensures that the data transfer remains minimal, while CDNs see to it that the content reaches users from the nearest geographical point. When combined, these technologies not only improve site speed but also contribute to overall user satisfaction, making them indispensable in today’s fast-paced web ecosystem. As we move forward, the harmonious integration of such optimizations will only grow in importance, shaping the future of seamless digital experiences.
